Showing posts with label crafts. Show all posts

Thursday, December 15, 2011

Hanging Name Plates for Children's Wall

I got the idea for this craft at Michaels. I was wandering through the aisles looking for yet another misplaced item, and I saw wooden plaques with names on them. Yes! Finally something cute I can do myself to fill up the wall space in my kiddos room! Probably the hardest part was traveling to a few different Michaels looking for all the letters I needed. Here is the finished products!


You will need:

2 wooden plaques, Michales has quite a few shapes to chose from
Ribbon in any color
Wooden letters of the names you are spelling
Acrylic paint
Hot glue gun
Optional- glitter glue, wooden decorations (same aisle as the wooden items) 

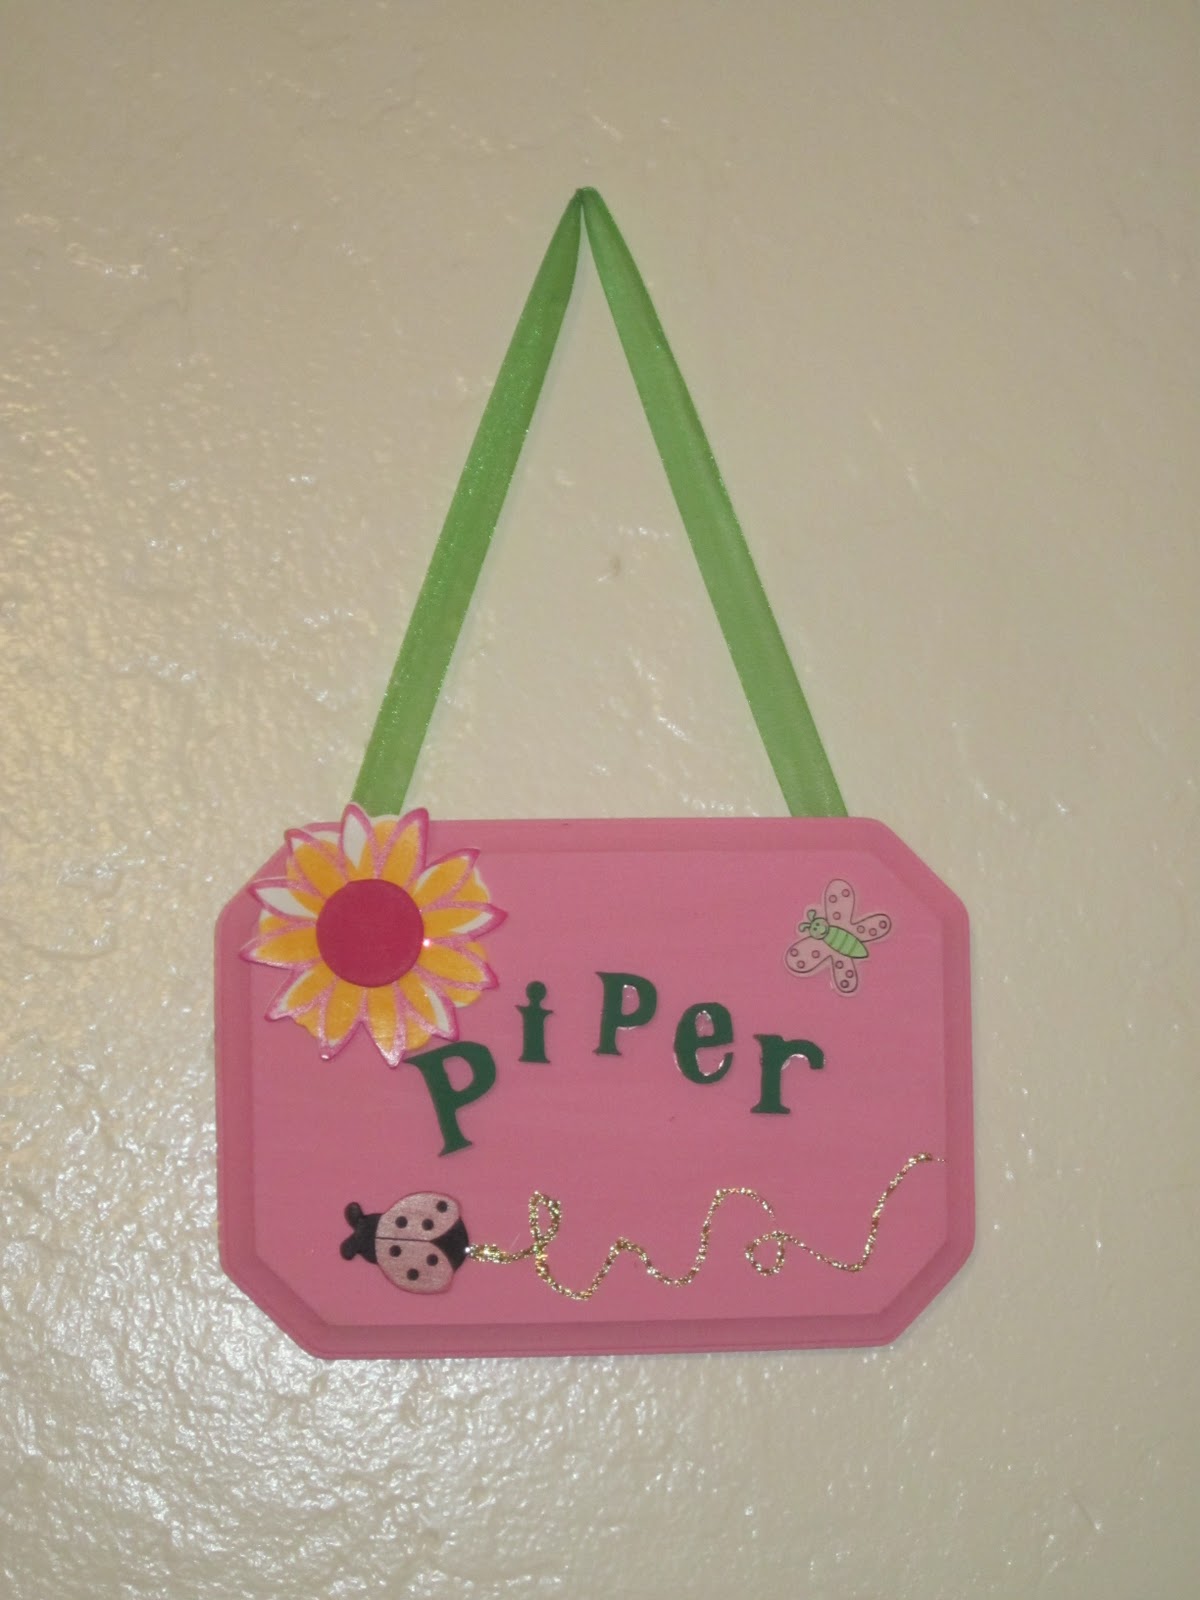
1. First, paint the plaque and letters with acrylic paint. For a good visual, try contrasting colors on the color wheel. I used pink/green and blue/yellow.

2. Next, when these are dry, hot glue the letters down so they spell your child's name. I am not a fan of anything straight, so I put my letters are various angles.

3. Next hot glue your extras, such as wooden lady bugs or palm trees, and add your glitter glue. Michaels has a good assortment in the same aisle as the letters.

4. When all of this is dry, cut off about 15 inches of ribbon. This will be used to hang your plaques on the wall. Find how long you want them and cut it to size. Take the ends and hot glue them to the back of the plaque. Let dry completely.

5. Hang on your child's wall and enjoy!

Bow and Hair Clip Holder

Having a baby girl, and being a girl myself, I know we come with a lot of accessories. Hats, hair ties, hair bows, hair clips, and this is just Piper! She doesn't have 5 different kinds of boots and a rainbow assortment of scarves yet. The big dilemma comes when you try to find a place to put it all! I am not one to just throw them all in a shoebox and stuff them in a drawer either. Then they get pushed aside and never used. So, I had to find a way to organize them all. Enter Pinterest, my new obsession. I found something similar to this, and thought it was cute so decided to give it a try. Here is what you need:

1 picture frame
1 can of spray paint, any color. I used pink.
1 spool of ribbon
10 of those little half circle nails
optional- some kind of embellishment, I used 2 silk flowers from Michaels

First, you will need to take the half circle screws and screw them into the bottom of the frame. In the picture above my wonderful husband has already done this step. You can do as many as you want, but it is worth the extra effort to measure and space them evenly.

Next you will spray paint the whole frame. If you got a wooden frame this will be  easy. I was silly and got a plastic frame, and apparently no spray paint sticks to plastic. I almost gave up hope and bought a wooden frame when I stumbled upon Martha Stewart's line of paints. It actually sticks to everything! So $2.99 later I came home and painted the whole thing. Spray paint will probably take 2-3 hours to completely dry, the acrylic longer. I ended up waiting overnight since I applied many coats to cover the black color of the frame.

Next, take your ribbon and cut into strips. These will be stretched the height of the frame. I used 5 strips. Take a staple gun and secure the ends, being sure not to fray the ends.

Now. take a hot glue gun and glue your flower to the frame. I decided to use both flowers that came in the package I bought. And viola! Homemade hair bow and  clip holder:

Pretty nifty huh? And all under $10 too!


Thursday, November 17, 2011

Christmas craft #1- homemade hot cocoa in jars

So, being on bed rest has left me plenty of time on my hands. Rather than sit back and watch tv (like I probably should be doing) I have taken this time to get things crossed of my life's to-do list. I have already picked out my birth announcements, got all the addresses of family and friends for that, addressed, stamped and filled out all my Christmas cards, and even tried a few Christmas recipes (FYI I STILL stink at making Rice Krispie treats). I have also started making some Christmas gifts. My first completed project is homemade hot cocoa in vintage masonry jars. Here is how they came out:


Way better than what I had originally envisioned! But that's the thing with me and ideas- it will start off small but as I get going I will get inspired to do more! Let me share how I did this:


First I dug around online and found a bunch of recipes for DIY hot cocoa. I took them all and just mixed them. My son had a great time pouring dry ingredients into a large glass bowl. He also had a great time being the guinea pig and trying each batch of hot cocoa (though he always gave it two thumbs up). Here is what I ended up using:

  • 4 cups powdered milk
  • 1 (6 ounce) package non-instant chocolate pudding mix
  •   2 cups powdered chocolate drink mix
  •   2 cups powdered non-dairy creamer
  • 2 cups confectioners' sugar
  • 1/2 cup unsweetened cocoa powder
It still wasn't as sweet as I wanted it to be, but hey I am not in the business of giving people diabetes either! The next step was finding the right glass jars. I wanted a vintage look, and I wanted them to be functional (ie not so old they can't open) as well. I found these beauties at Michaels for $1! So I got home, washed them, and dried them out. Next, I filled the jars about 80% full of the cocoa. The rest of the jar I filled with mini marshmallows to the top. That is when the idea to dress it up more hit me! I ran to Michaels (rather drove and waddled real fast up and down the aisles) and bought red and green card stock, crazy cutting scissors, and holiday ribbon. I got home and typed up cute printed instructions on red paper, cut it out with the crazy scissors, mounted it on green paper and hot glued them together. I punched a hole in them, and strung the holiday string through it. Then I tied the holiday string, glued a jingle bell I had lying around in the middle of the knot, stuck a candy cane stick on it, glued any loose parts, and viola! Instant gift! I plan on giving these to my mom, mother-in-law, sister-in-law, a few friends and some girls from work. I am so proud of how they came out, I wish I could pass them out now!! Until next time :)